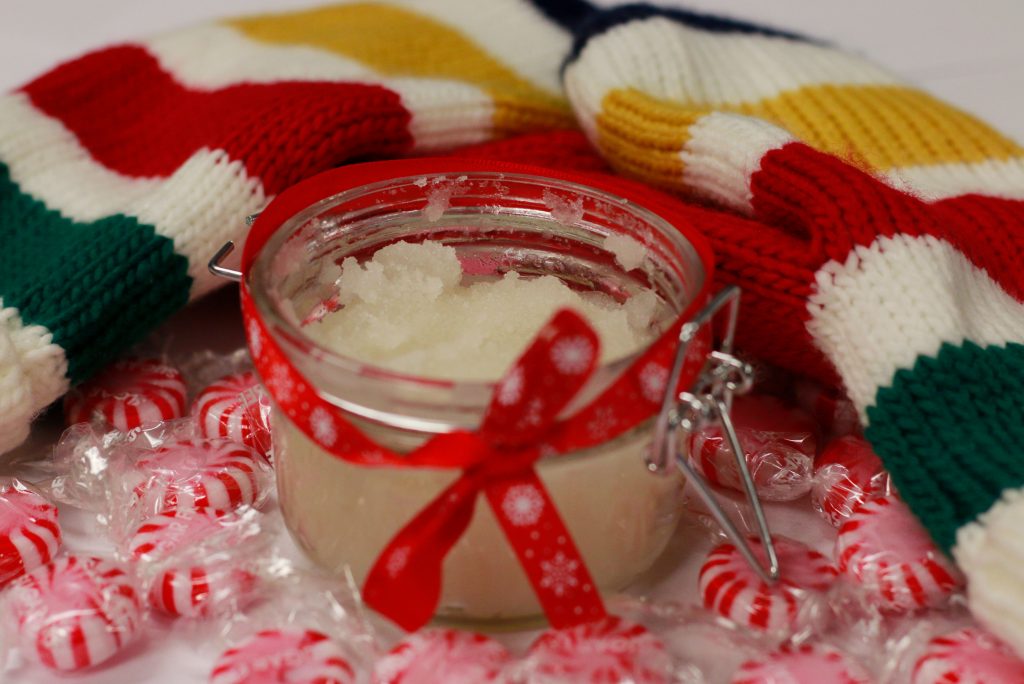
Whether you’re in need of a last-minute gift for a Secret Santa exchange or just want an inexpensive and unique option for a friend, making a do-it-yourself gift is a great alternative to buying something at the store. These presents will not only impress your friends but also help you skip the inevitable long lines of holiday shoppers.
Peppermint Sugar Scrub
This easy gift puts a twist on the traditional sugar scrub and is perfect for anyone who loves feeling — and smelling — festive. The scrub also provides much-needed exfoliation for those trying to get rid of dry skin brought on by the brutal Binghamton winter.
What you’ll need:
— One medium bowl
— ½ cup of coconut oil
— 1 cup of granulated sugar
— 12 to 15 drops of peppermint essential oil
— Small Mason jars (4 ounce)
— Twine or red ribbon
— Holiday gift tags (can be handmade or bought in a store)
How to make it:
1. Melt the coconut oil in a medium-sized microwave-safe bowl for about 30 seconds in the microwave.
2. If the coconut oil is still not melted, keep microwaving the bowl in 10-second increments. Wait five minutes to let the bowl cool before taking it out of the microwave.
3. Next, stir in the cup of granulated sugar and essential oil until everything is evenly combined. For the essential oil, put in 12 to 15 drops depending on whether you want the scent to be light or strong.
4. Place the scrub in the jar and close tightly. Punch a hole through the gift tag if it already doesn’t have one, and write any message on the tag. If you’re making your own tag, find a blank gift tag template online and print it out. The freedom of how you want your tag to look is completely up to you.
5. In addition to writing a personal message on the gift tag, be sure to write down that the recipient should microwave the scrub for 10 to 15 seconds before use. Pull the twine or ribbon through the tag and wrap it around the jar.
Adapted from Sugar and Soul Co.
Snow Day Survival Kit
Combining store-bought items with a homemade touch, this gift is perfect for anyone who prefers cozy slippers over boots on a snow day. Because you’re putting it together, this kit can be completely tailored to your recipient’s taste.
What you’ll need:
— A basket or gift box
— Hot cocoa packets
— Marshmallows
— Holiday-themed ribbon
— Construction paper
— iTunes or Google Play gift card
— Snacks and sweet treats (homemade or store-bought)
How to make it:
1. Arrange all the items nicely in the basket. What you put in the basket is completely up to you. An iTunes or Google Play gift card, which lets you download movies, games and music, is a must-have for a basket with a stay-at-home theme. Beyond pre-made snacks, you can also add homemade treats like Pipe Dream’s Peppermint Bark and Toffee Bar recipes from the Nov. 20 “Unique Holiday Desserts” article.
2. Wrap some holiday-themed ribbon around the basket and tie it into a bow. Write out “Snow Day Survival Guide” in nice hand lettering on construction paper and place it on the basket.
Marbled Mugs
Having a go-to mug is essential during the winter months to hold hot cocoa, coffee, tea and other warm drinks. If you’re not the best artist, making a water-marbled mug is the perfect alternative to drawing or painting on one, because it doesn’t require a lot of skill.
What you’ll need:
— Disposable foil pan
— Warm water
— Assortment of nail polish colors (any colors you want)
— Toothpicks
— White ceramic mug
— Dishwasher-safe Mod Podge
How to make it:
1. Fill your disposable pan with two to three inches of warm water, adding more depending on how far you want the marbling to go up the mug.
2. Next, pour small amounts of nail polish into the pan, pouring more or less depending on how much color you want.
3. Working very quickly, use the tip of the toothpick to swirl the nail polish around the surface of the water to create the marble effect.
4. Quickly dunk your mug into the nail polish water, going straight down and straight up.
5. Move the mug onto a paper towel to let dry, avoiding rubbing the painted surface.
6. Once the mug is dry, apply a light coat of dishwasher-safe Mod Podge so your mug is protected when washed and dried.
Adapted from The Sweetest Occassion.


